Building Your Plant Based Kitchen – A Spiralizer

Spiralizer

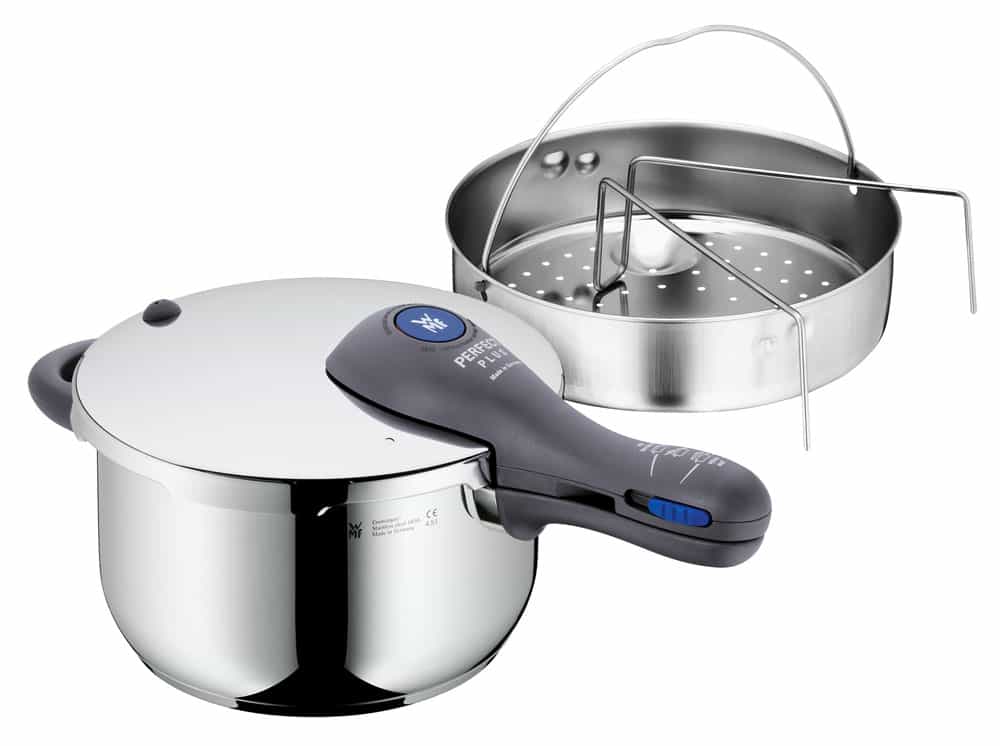
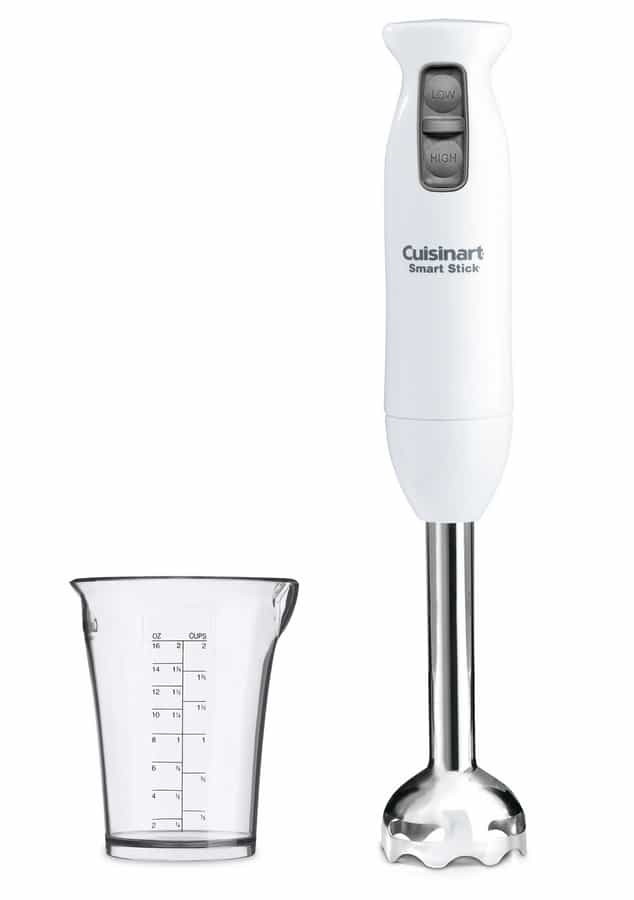
Ready to take your plant based kitchen to the next level? Consider a spiralizer. In this final post to my Building Your Plant Based Kitchen series, we take a close look at spiralizers. After a month of tool talk that included insight into owning a Vitamix, an immersion blender, a pressure cooker, and the right knives and cutting boards, you should be well prepared for every new recipe you plan to test drive in 2016.

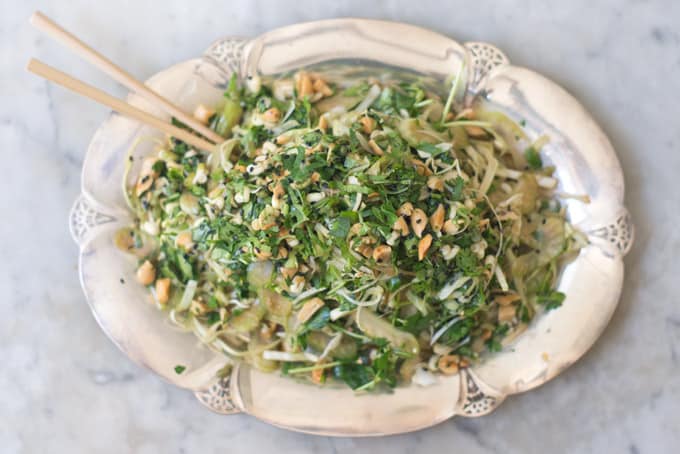
So who might want a spiralizer? YOU… If adding another layer of interest to raw veggie salads with crazy colorful curls of beets, carrots, and zucchini sounds delightful or you are ready to ditch the grains and want a better-than-pasta base for those amazing vegan sauces you plan to whip up with your immersion blender or Vitamix.

So now comes the challenge – finding the right one.

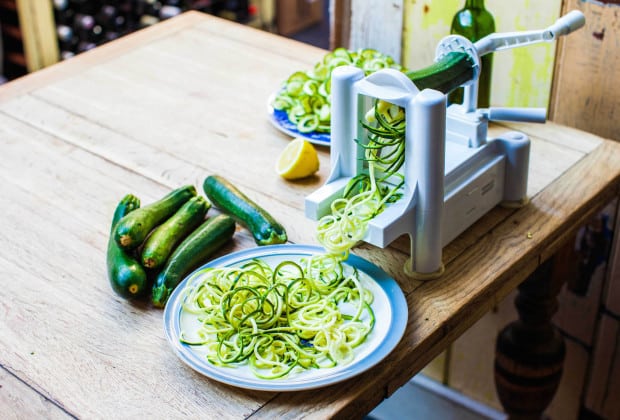
If you are brand new to this concept, it may help to know that there are two styles of spiralizers: the models with a crank style handle that have a selection of blades and the simple hand held model that will fit in your kitchen tool drawer. Here’s a great review from Foodal that will provide some further insight for your decision making process.

Spiralizer

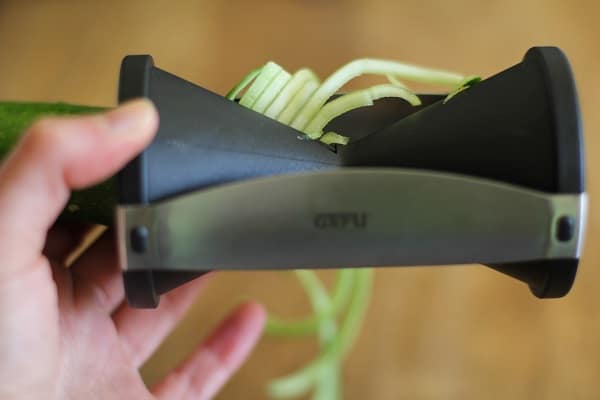
I was gifted this spiralizer just over two years ago when, as a family, we raised the bar on our attempts to eat plant based. Full disclosure – I have not mastered this skill. I cannot yet claim to be a spiralizing genie. But I want to be! Reading up on the subject has convinced me that my lack of accomplishment in this area could really come down to an inferior tool. Hopefully, down the road, I’ll be able to report back on which one I choose to invest in next.

Ready for a test drive?
If you have a hungry teen with a never ending appetite around like I do, then I suggest these Spicy Spiralized Sweet Potato Fries for an afternoon snack.
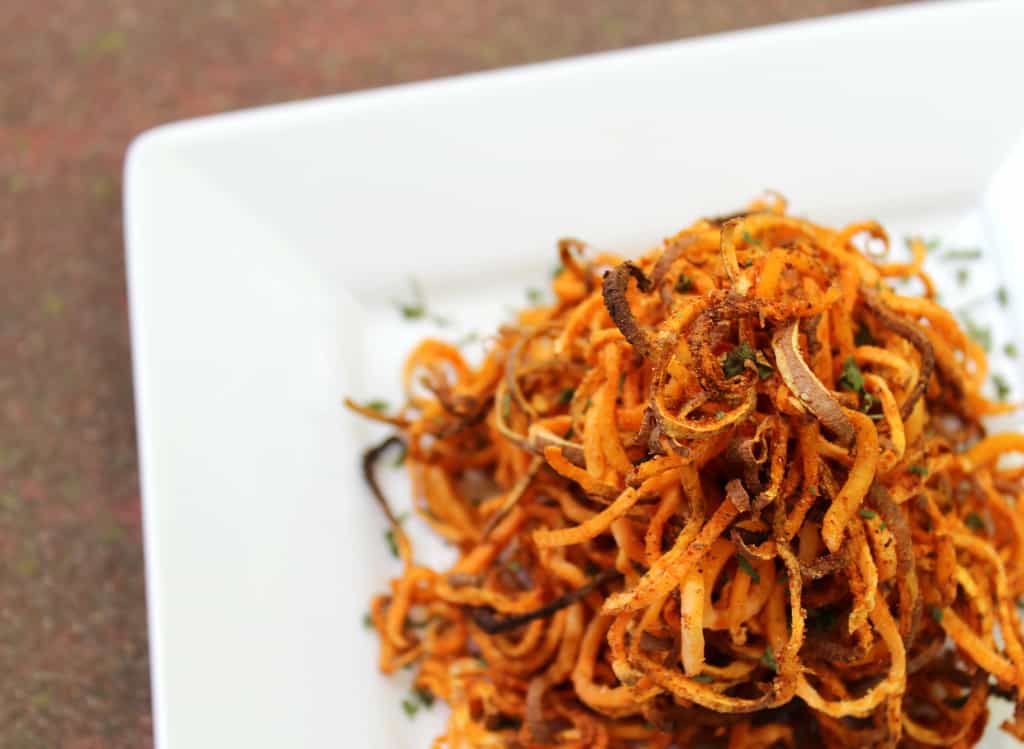
Spicy Spiralized Sweet Potato Fries

Ingredients:
Sweet Potatoes (I used two for my hungry guy and there was only a taste for me!)
Garlic Powder (optional)
Onion Powder (optional)
Cumin
Black Pepper
Smoked Paprika
Pink Sea Salt
(I added a tablespoon of melted coconut oil before baking)

Full Instructions Here


Your Home Guide to Gemmotherapy III: Digestion Woes

Indigestion

In this continuing series on home use of Gemmotherapy, I’d like to offer a very simple alternative to antacids or any home-cure for indigestion. It’s important to remember this protocol, and all protocols in this series, are for acute, occasional symptoms- not for ongoing chronic symptoms. Chronic digestive symptoms need to be brought to the attention of your health care provider. If you aren’t sure how to decipher between acute and chronic symptoms this blog post may be useful.

The specific symptoms for which I’d like to offer a protocol today is acid-reflux, bloating, or discomfort you might feel after over indulging or eating a meal that doesn’t agree with you. The symptoms typically begin within the first hour after eating or once you lie down. You might feel burpy, puffy, and/or mildly uncomfortable. You may even feel bit of acid-reflux when you burp. This is when most of America will reach for an antacid of sorts. I’d like to offer you a better alternative.

Fig Gemmotherapy extract not only relieves the symptoms, but its ability to clean and fortify the tissues of the digestive tract, from mouth to stomach, will be an added benefit you cannot get from any other therapy. Fig has a calming effect on the entire body that soothes an irritated digestive tract. It’s ability to support digestion of food as well as emotions make it a useful Gemmotherapy extract to have on hand.

Maybe you used this protocol and had good results? Send us your story. We’d love to hear from you!

Are you a practitioner and would like to learn more about using Gemmotherapy with your clients? Take a look at my online training modules including my latest one on Acute Care. You might also want to join me in Boston for one of my live teaching seminars. The next one is scheduled for February 27, 2016. The more of us out there trained to use effective and affordable therapy, the better


Building Your Plant Based Kitchen – A Vitamix

Vitamix

Yes, you can run a highly efficient plant based kitchen without a Vitamix but having one does make the prep of everything from smoothies to sauces to soups just that much easier. It was our commitment to morning smoothies that pushed the decision to purchase one and we have literally used it every morning that we are home for 2.5 years straight.

There certainly is a lot of thought that needs to go into paying more than $300 for any piece of kitchen equipment. It is no doubt a purchase for those fully committed to using the machine day in and day out. However, if eating at home more is one of your goals as you shift to plant based eating, then having the right tools will absolutely help support that change in behavior. There is no doubt it is an incredible addition to your kitchen.

Here is a great blog post by the Frugal Girl that weighs the investment of Vitamix. She also gives some great tips on finding one at a lower price point. I bought the most basic model Amazon offered at the time and honestly have never missed any of the options. You might want to have a look at the reconditioned models Vitamix themselves offers or watch your local Craigslist.

So how do I use my Vitamix? As I mentioned before, it is our breakfast machine and it cranks out seasonal smoothies in a flash with a container large enough to fill us all up in one go. Ours is always used at least one more time later in the day whether it be for fresh herbal salad dressing that blend in seconds, plant based cheese sauces, pestos, or soup. It also was one of the first tools my son was drawn to, likely due to the power and sound it produced!

Ready for a test drive?

While these recipes can absolutely be made with an immersion blender, nothing quite gets the sauces as smooth and creamy as a Vitamix. Before ditching dairy, as vegetarians, we were quite the cheese-centric family. So when we cleared our fridge of all milk based products there was no doubt a big hole. Ever the scientist, my then preteen son went on a quest to create the best cheezy plant based sauces. After conquering cashew based sauces, finding nut free options were his next challenge. Here are two of his latest go to recipes, each producing a smooth, flavorful, rich sauce that will compliment a variety of dishes from roasted veggies to gluten free grains.

Oh She Glows Cauli-power Alfredo

Blissful Basil’s Sunflower Seed Alfredo


Your Home Guide to Gemmotherapy II: Acute Coughs

Gemmotherapy For Coughs
Today, as part of my series on home care with Gemmotherapy, I’d like to share some useful and timely information regarding care for acute coughs in either children or adults. Gemmotherapy actually provides several answers, depending on the type of cough experienced, which I will explain further on. What should make Gemmotherapy extracts your first choice over OTC or herbal cough syrups, when it comes to a cough, is their ability to clean, feed, and fortify cellular tissue. These actions leave the upper respiratory system and entire body stronger and more resilient at the end of treatment. Since Gemmotherapy extracts lend themselves to home care in a variety of acute conditions, you will find as you learn more protocols that a small set of Gemmotherapy extracts can virtually replace all the supplements, herbal remedies, and OTC medications you have on hand to care for yourself and family members.

Below I will describe three general categories of coughs that can be cleared with the use of Gemmotherapy. Please keep in mind this article is referring to an acute cough, one that comes on suddenly or accompanies other upper respiratory symptoms. This article does not address chronic, long standing coughs that require a different protocol. Here’s an article that helps explain the difference between acute and chronic symptoms.

During the winter season, upper respiratory congestion from a virus or seasonal allergies can often bring on a nagging cough. The post nasal drip that occurs often leads to an irritated throat and a cough that is dry and scratchy. This particular cough responds very well to the Gemmotherapy extract Black Honeysuckle. Known for its ability to reduce inflammation in the upper respiratory tract, calm and soothe these smooth muscles, and boost the immune response I have found Black Honeysuckle to be an excellent choice for the dry irritating cough that accompanies an inflamed throat.

There are times, however, when that cough progresses or an individual begins with a deeper cough, dry or wet, that is felt below the throat in the upper chest. There is ususally discomfort upon coughing and it produces a sound with more depth than the first cough described. This cough often worsens upon lying down at night and/or in the morning upon waking. Hornbeam Gemmotherapy extract is the most helpful for this type of cough because it addresses the upper respiratory inflammation, cleans and strengthens the lungs, and supports the filtering actions of the liver.

A spasmodic cough, one that leads to pulmonary spasms or croup needs the soothing qualities of Lithy Gemmotherapy extract. These coughs are seen as “unproductive”, often accompanied by tightness in the chest making an in-breath feel challenged, can appear upon lying down at night, during the night, or be induced by exercise or talking. Many will find this cough lingers much longer than they would expect. That occurs because their elimination organs alone (bowel and kidney) have not been able to clear the inflammation.

Finally, when a virus and cough has gone on for an extended period, once the acute symptoms have improved, some convalescence time is called for and an evening dose of Hazel Gemmotherapy extract, to support healthy lung and liver function is quite helpful.

Each of these cough specific Gemmotherapy extracts work best in a protocol that supports the entire body during this acute period. Common Alder, Dog Rose, and Black Currant together compliment any of the recommended cough extracts.

Have you used this combination and had good results? Send us your story. We’d love to hear from you!

Are you a practitioner and would like to learn more about using Gemmotherapy with your clients? Take a look at my online training modules including my latest one on Acute Care. You might also want to join me in Boston for one of my live teaching seminars. The next one is scheduled for February 27, 2016. The more of us out there trained to use effective and affordable therapy, the better!


Building Your Plant Based Kitchen – Pressure Cooker

pressure
I’ve been cooking family dinners a long time, like since I was ten years old and until a year ago pressure cookers were a mystical tool that definitely seemed out of my league. Because I now know that we need to get curious and comfortable with what scares us, especially regarding our passions, I took a closer look.  Of course my German mother-in-law, who runs THE most efficient kitchen I have ever seen, was a master with her pressure cooker. I always found myself wincing each time she released the pressure, steam pouring out of the spout, waiting for an explosion. After years of clearly seeing that no one actually was injured in the process, I stepped up my game and began practicing with hers. I was shocked to find how easy it actually was to use and how much time it shaved off of meal preparation.

Two summers ago I imported my very own shiny WMF Pressure cooker in my suitcase, only to discover I could have easily purchased the same model on Amazon. Lesson learned. That aside my pressure cooker soon took center stage in my kitchen and hasn’t been demoted from it’s best supporting tool role since. I use mine for all varieties of lentils, beans, grains, and every soup and sauce I cook. The learning curve wasn’t at all steep and the results have always been spot on.

Want to learn more about pressure cooking? The Kitchn offers this useful guide to pressure cooking resources.

Ready for a test drive? May I recommend this luscious African Yellow Split Pea Soup.

Ingredients:
1 tablespoon olive, grapeseed, or safflower oil
1 yellow onion, chopped
2 poblano or hatch chili peppers, chopped
3 cloves garlic, minced
1 tablespoon grated or minced ginger
1 teaspoon ground cumin
½ teaspoon Harissa powder (more to taste–it’s spicy, so feel free to add extra if you like heat!)
½ teaspoon turmeric
¾ teaspoon salt (or to taste)
1 lb sweet skinned and roughly chopped garnet yams or sweet potatoes (about 3½-4 cups)
1¼ cups yellow split peas, picked over to remove any grit (I presoak mine overnight)
6 cups water or low sodium vegetable broth
½ cup almond or coconut milk (I do not recommend light coconut milk or soy)
black pepper
⅓ cup chopped green onion tops or cilantro (for garnish)

Full Instructions Here.

Enjoy!


Your Home Guide to Gemmotherapy I: Seasonal Allergies or Sinus Congestion

Today kicks off the first post in my new series on Gemmotherapy for home users. I am super excited to share with you simple, focused protocols that each and every one of you can use at home for everything from headaches to seasonal allergies. The beauty of Gemmotherapy extracts is that they lend themselves to home care for a wide variety of acute conditions. Gemmotherapy extracts have been my go-to for years because they go well beyond their herbal counterparts in their ability to clean, feed, and fortify cellular tissue, leaving your body stronger and more resilient at the end of each treatment. I love the fact that a small set of Gemmotherapy extracts can virtually replace all the supplements you have on hand to care for yourself and family members.

January is the start of Austin’s cedar fever season and I dedicate this post to of all the sneezing, foggy headed, watery eyed citizens of Austin. While the rest of the country deals with snow and ice, a good majority of Austinites face  unique winter seasonal allergies due to the abundance of Ashe Juniper trees, locally referred to as cedar, that break loose with a pollen shower for all. Whether at your office or checking out at Whole Foods this month, you will no doubt catch at least one conversation from someone suffering with symptoms. While I can’t set up a stand on Congress to help all those affected, I can ask you to share this article with those you know who are looking for a more sustainable way to treat themselves this season.

This article is meant to assure you there is life beyond Zyrtec!

You can learn more about why these horrible symptoms plague you and why your partner or colleague may seem unscathed by reading this post. Today, however, I”ll share the simple steps to deal with what you may be facing right now.

  1. Use these three Gemmotherapy Extracts: Common Alder, Black Currant, and Rose. Take doses of 25 drops of each up to 3x daily until your symptoms become manageable. Continue one dose of all three Gemmos each morning for maintenance (even if symptom are not present).
  2. Cut out dairy products during allergy season.

For the majority of individuals this is enough. If this still isn’t cutting it for you (and you aren’t sneaking cheese) here are some reinforcements to consider this first year of treating with Gemmotherapy. My experience with supporting clients these past years has proven that the first year is the most challenging and continued use of Gemmotherapy improves the symptoms dramatically the next year.

  • Add an evening dose of 25 drops of Hornbeam throughout the season for further respiratory and digestive support.
  • Take Sinupret as an adaptogen as needed, especially as your body is transitioning off of an allergy medication. This herbal blend has no side effects and is also useful for sinus congestion not related to allergies.
  • Take a daily probiotic during the season. I recommend this powder by PuraDym or Mindlinx by Pharmax.

Curious why the combination of Common Alder, Black Currant and Dog Rose work? Here’s a graphic to answer that question.

Seasonal Allergies and Gemmotherapy
Have you used this combination and had good results? Send us your story. We’d love to hear from you!

Are you a practitioner and would like to learn more about using Gemmotherapy with your clients? Take a look at my online training modules including my latest one on Acute Care. You might also want to join me in Boston for one of my live teaching seminars. The next one is scheduled for February 27, 2016. The more of us out there trained to use effective and affordable therapy, the better!


Building Your Plant Based Kitchen – Immersion Blender

blenderThere are a handful of tools I put to work everyday in my kitchen. While my Vitamix is put to test for every morning meal, the immersion blender rules each evening. I use it for every salad dressing, soup, and most sauces I make. It’s a brilliant tool, cleans in seconds, stows away easily in a drawer, and is up to a wide variety of tasks.

I have burned through a few models since my obsession began some fifteen years ago in Germany. My current Cuisinart Smart Stick however is still going strong after seven years. That’s a record. I attest this to the Cuisinart brand engineering, of which I happen to be a big fan. My mother-in-law has this model that I use each summer and I must say the chopper/grinder attachment is pretty cool. I’ve used it to make a variety of herbed nut spreads that were as easy to make as they were smooth and delicious.

Whichever model you choose will certainly need a test drive and I suggest doing so with this Thai Pea Soup. Here’s all that is needed to serve up a brilliantly green bowl full of goodness.

pea soup


Ingredients:
1 onion, chopped (or leek)
2 large clove of garlic, chopped (or shallots)
2 tbsp olive oil (or coconut oil)
3 cups frozen or fresh peas
2 1/2 cups water
1 tsp yellow curry (try my favorite brand)
2 stalks fresh lemongrass, minced
1/2 can coconut milk (full fat is creamier!)

Full Instructions Here.


Welcoming 2016: Be Fearless

Woman Jumping into Ocean

The past four weeks leading into 2016, I shared my thoughts and suggestions on intentions that could serve the body, mind, and soul in order to tap into your true self. The reward in discovering your true self is the ability to live out your destiny, who you were born to be, and deliver the unique gift that only you can offer.

Getting clear about what is needed in 2016 to serve your body, mind, and soul is the beautiful part of this process. It’s the days ahead that get messy. That’s what I want to talk about today – The messy part. My friend and gifted designer, Christine Terrell, recently reminded me of the book, The War of Art. While this book was written with writers in mind, it is really THE handbook everyone needs as they face the constant battle to practice their gift. This book will serve you right now as you attempt to put in to actions any of the various intentions I shared in my last blog series.

Setting the intention to be more you

Setting intentions for your body

Setting intentions for your mind

Setting intentions for your soul

The intentions that feed your body, mind, and soul – The ones that inch you deeper into your true being always face a barrier between the idea as a concept and taking action. That barrier is RESISTENCE.

I immediately identified with The War of Art from my perspective as a writer. I have set some pretty lofty goals for myself these first two months of 2016, one of which leads to a lifelong dream of publishing my first book. I gifted myself in 2016 with the commitment of an additional early morning writing session each weekday from 6-7 am. It was at 5:55 this morning, as I first opened my eyes, tucked in under my duvet that I met RESISTENCE. “Oh, Hello,” I said, “Funny you would show up!” In the short span of five minutes of waking, RESISTENCE rallied with a host of very logical reasons why I did not need to meet that commitment , actually, today. I first reasoned that I was ridiculously warm and cozy, my office was not, and possibly I could outline this post in my head while still in bed. Nice try. I then considered moving the time to later but realizing then that that bumped up against my commitment to swim at 8 am. What to do? I found the more minutes that passed the stronger my RESISTENCE grew. Hmmm. If that is the case, and my enemy RESITENCE is growing stronger, this battle I am engaged in will only take energy from the very intention I set to nuture my soul by writing. With that thought, I reached for my glasses and my feet hit the cold floor.

I share this personal clip with the hope that you will see RESISTENCE is ever present with even the most benign step toward our authentic self. It will show up in all shapes and forms from discouraging friends and/or family members, lack of time, exhaustion, dwindling resources,etc.. It will wear many hats but it is still RESISTENCE and we must face it with fearlessness in order to break through the barrier it sets to our true self. That barrier will rise up when you pass the breakfast taco trailer first on your way to your juice stop, it is present in the cold drizzling rain as you head out for a run, or becomes the voice in your head attempting to prevent you from putting your pencil to the paper to sketch the idea you’ve been pondering.

Knowing that RESISTENCE will come, recognizing it for exactly what it is, and fearlessly pushing through it is powerful. Be fearless today against your RESISTENCE. And then do it again tomorrow.

design


Lauren’s Kitchen: Building your Plant Based Kitchen for 2016

Cleaning out and organizing my kitchen is a task I take on each New Year and again when I return from my summer weeks in Europe. Both times present an opportunity for a fresh look at what fills my shelves and drawers.

In addition to cleaning through my pantry staples, I assess the tools I have on hand and take account of what is useful and meets my needs, what I haven’t used, and what needs to be replaced because it is not efficient or broken.

This past summer, having returned home from Germany and working a month out of my mother-in-law’s efficient-to-the-last-detail kitchen, I took on the task of sorting my vast conglomeration of kitchen hand tools. First on the list to review was the odd assortment of kitchen knives, none that did any particular job really well. After enlisting the help of my favorite family researcher, I chose two. Over the last six months I have found that they excel at every task in my plant based kitchen. To say we chop a lot of fruit and veggies by hand is an understatement and these two definitely make quick work out of it all.

Knife Recommendations

Classic 8” Chef’s Knife by Victorinox

victorinox-8-chef-knife-w-fibrox-handle

Utility 4.5” Serated Knife by Victorinox

71Wq157N12L._SL1500_

Cutting Boards

While on the subject of chopping why not take a look at your cutting boards? These are tools used to prepare each and every meal at our house. After all the years of thinking plastic cutting boards are the way to go the truth is they are not. They happen to be tough on knives and actual harbor more bacteria than wooden boards because they are so prone to nicks and cuts. This article provides a bit more insight on the topic.

We happen to own bamboo cutting boards. Last summer I purchased a set of three that almost serves all of my needs. I’m adding this one for the New Year to replace the last plastic board we having been using for the vast amount of morning fruit chopping we do.

Test Drive

So now that you are ready for some serious chopping how about putting your new knives and cutting board to the test with this light and crunchy Shredded Salad from the archives of 101 Cookbooks?

a_good_shredded_salad

Ingredients

2 teaspoons sunflower oil
1/2 teaspoon toasted sesame oil
1 tablespoon plus 2 teaspoons runny honey
fine grain sea salt, to taste
one small bunch of cilantro (leaves and stems), chopped
1/2 cup peanuts, toasted
1 bunch of scallions, shredded
2 cups finely shredded cabbage
1/2 cup mung bean sprouts
1/2 cup broccoli or pea sprouts
3 large stalks celery, thinly sliced on diagonal
2 tablespoons shoyu or soy sauce
1 tablespoon (brown) rice vinegar
toasted sesame seeds, black or white

Full Instructions Here