Fall Fruits III: Persimmons

persimmons

I really need you to know that if you aren’t into persimmons yet, then you are really missing out! It’s like those of us enjoying these delightful fruits are part of a secret club and that just isn’t right. Get out there today, add a few to your shopping cart, and I promise that you won’t be disappointed. BUT, before you grab just any persimmon take heed- There are two varieties that are widely marketed today and they vary dramatically in taste and texture. The one you want (trust me on this) is the Fuyu (pictured above). These are squat in shape, very firm, and meant to be eaten exactly like that. The other is an astringent type that must be ripened to a state similar to gelatin. While it can also be used in baking, BOTH recipes I share today are for Fuyu persimmons.

While it’s a rare persimmon that is around long enough at my house to be cooked, here are two creations I am sure you will enjoy, another fall soup and, of course, a pie.

Persimmon Butternut Soup
Spicy and smooth with just a hint of sweetness, this makes a perfect meal as the evening temperatures drop.

Ingredients
2 cups butternut squash
3 Fuyu persimmons, medium
1 cup coconut milk
8 oz vegetable broth
1 tbsp maple syrup
1 tbsp nut butter, roasted
Toasted nuts and chili sauce (optional)
3 cloves
1/8 tsp ginger or cinnamon (if you prefer more sweet than spice), ground
1/2 tsp paprika, smoked
1 dash pepper
1/2 tsp sea salt
Oils & vinegars
1 tbsp olive oil or coconut oil

Full Instructions Here
Persimmon Pie
How about kicking off pie season with this gorgeous dairy free and grain free recipe?

persimmon-pie

Pie Ingredients
1½ cups “Fuyu” persimmon puree from about 5 persimmons
½ cup coconut milk (full fat)
¼ cup maple syrup (or honey)
1 teaspoon vanilla extract
1 teaspoon cinnamon
1 teaspoon pumpkin pie spice
1 teaspoon ginger juice

Paleo Pie Crust Ingredients
11/2 cups almond flour
2 tablespoons coconut flour
1/4 cup coconut oil
3 tablespoons maple syrup
1 teaspoon vanilla extract
2 pinches sea salt

Full Instructions Here


Fall Fruits II: Pears

pears

One of my favorite snacks this time of year is a plate of fresh sliced ripe pears. However, unlike most winter fruits, pears take a bit more care in handling. Picked and shipped unripe, they come into their own on your kitchen counter but their “perfect” state can be a narrow window of time so a close eye must be kept.

What you might not know about pears, though, is that there can be quite a variance in taste and texture based on the variety you select. Saveur magazine offers this visually appealing guide to ten of the most commonly found pear varieties. What’s my favorite pear? Well, hands down it is Bosc. I love the look and taste of this rustic pear. And the fact that it ripens quickly might just be another reason I enjoy it so much!

While pears are a perfect snack all on their own they can easily play a starring role at any meal of the day. Here’s a sweet option for the start of your day and a savory recipe for your evening meal.

I encourage you to try a Creamy Pear Avocado Smoothie this week. While this yummy blend happens to be a little rich for my morning taste, I find this combination perfect as a late morning snack or even a lunch replacement when I am on the go.

pear-smoothie

Ingredients
2 ripe bananas (or previously frozen)
1/2 ripe avocado
2 small ripe pears (all varieties work well)
2 1/2 cups | 375 ml. almond milk (or any organic plant-based milk)
4 homemade frozen green cubes (or frozen spinach or 2 handfuls dark leafy greens)
2 tbsp hemp seeds
1 tbsp hemp protein powder (as I am not a fan of protein powders I suggest omitting this)
extra hemp seeds for sprinkling

Full Instructions Here

And why not have fruit for dinner? Cauliflower Hazelnut Soup shows how pears and cauliflower become a perfect compliment to each other in this hearty fall soup with plenty of room for customizing. I’m always excited about another recipe I can prepare in my pressure cooker in minutes and this one was a huge hit at the Hubele house.

cauliflower-soup

Ingredients
2 tablespoons of unsalted butter (replaced with coconut spread or oil)
1 white or yellow onion, diced
1 1/2 teaspoon of dried oregano, divided
2 cloves of garlic, minced
1 medium head of cauliflower, washed and cut into small florets
1/4 cup of gluten free oats (replaced with 1 russet potato for a grain free version)
1/4 cup of toasted, skinned hazelnuts
1/2 a pear, cored and diced
1/2 cup of canned white cannellini beans, strained and rinsed
About 5 cups of vegetable stock (homemade or use Rapunzel bouillon cubes)
3/4 teaspoon of salt, divided
1/2 teaspoon of pepper, divided
1 tablespoon each of fresh thyme and parsley leaves chopped
2 tablespoons of chopped toasted skinned hazelnuts
1 tablespoon of olive oil
Pinch of red pepper flakes (optional)

Full Instructions Here

Wondering about peeling the skin off of those hazelnuts? Here are two methods to consider, I’ve been a fan of the roast and rub method for years and have found it good enough.

Enjoy!


Fall Fruits I: Apples

When we think of fall fruits,  beautiful crisp apples are likely the first to come to everyone’s mind. Some of my favorite childhood memories come from family excursions to Apple Hill in the foothills of Northern California where apple orchards are abundant and the smells of baked apple treats permeate the air all during the months of fall. Picking our own sweet crisp apples is a memory I have carried through my lifetime.

apples

Visiting Apple Hill was special for many reasons but in the 70’s it was truly the only place one could find heirloom and lesser known varieties. Our local grocery store offered two varieties if we were lucky: yellow (Golden Delicious) and red (Red Delicious). Thankfully our visits to Apple Hill exposed me to the world beyond the produce isle of Safeway.

While there are few things that beat the rich experience of purchasing crates of apples directly from the farm, we fortunately have access today to a wide variety of apples through farmers markets, CSAs, local organic co-ops, and grocery stores like Whole Foods. We can be spoiled by choice so here is a great guide to apple selection that may help your decision making process.

apples

While favorite apple varieties among my family members vary, I tend to bring home a healthy mix of Braeburn, Honeycrisp, Golden Delicious (all for eating)and Boskoop or Reinette (for baking).

Looking to add more apples into your diet? Here are a few no fuss ideas direct from my kitchen:

  • Juice a handful of any variety along with some carrots and ginger for a yummy mid-morning treat.
  • Add thin slices of Honeycrisp or Braeburn apples to kale salads along with a handful of golden raisins and toasted pumpkin seeds.
  • Slice up a Golden Delicious and pair with fresh ground almond butter or hummus for a perfect afternoon snack.

And who couldn’t use a recipe for that sweet tooth in your house? Here is a grain-free, vegan apple crisp, scaled to one serving, from Deliciously Ella that all can enjoy.

apple-crisp

Ingredients
(Serves 1)
1 red apples
1/3 cup of almonds (65g)
4 medjool dates
1 tbs pumpkin seeds
1/2 tbs chia seeds (Optional: I add them for their amazing health benefits but, if you don’t have any, omitting them won’t change the taste or texture.)
3 tsp cinnamon
2 tsp raw agave syrup (please replace with maple syrup or honey)

Full Instructions Here


Packable Lunches VI: Sweet Treats!

Are you ready for a break from savory ideas? Here I share two of my favorite packable treats, one baked and the other raw. Both recipes are processed sugar free, dairy free, gluten free, and flavor-full!

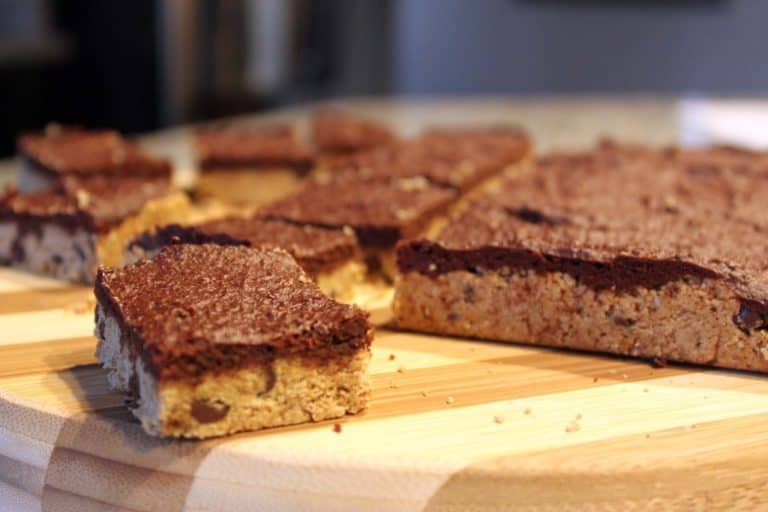
These Brookies are new to my family but they certainly got rave reviews. They go together quickly and the baked bars keep for a few days fresh or can be frozen for later use.

brookie-bars-1024x683

Here are the ingredients for the bottom “cookie” layer:
1 cup almond flour
1 cup gluten free oat flour
1/4 tsp sea salt
1/2 tsp baking soda
2 Tbs coconut palm sugar
1/3 cup mini chocolate chips (I use Enjoy Life dairy free)
2 Tbs cashew butter (melted)
2 Tbs coconut oil (melted)
2 Tbs maple syrup
1 Tbs vanilla extract

The brownie layer on top will need the following:
1/4 cup + 1 Tbs almond flour
1/4 cup + 1 Tbs gluten free oat flour
4 Tbs (rounded) unsweetened cocoa (I use AH!LASKA dairy free brand)
1/4 tsp sea salt
1/4 agave (please use maple syrup or honey as a better replacement)
3 Tbs almond milk
1 Tbs vanilla extract
3 Tbs coconut oil

Full Instructions Here


Raw Energy Bites

energybites3blog-460x450

You will find a wide variety of recipes in this category but I’m particular and prefer one that is grain free, naturally sweetened, a bit chocolaty, AND nutty. Because Deliciously Ella never disappoints, I turned to her for a place to start. Here is what she suggests you use, my alternatives are in parenthesis.

Ingredients
1 cup of medjool dates
3/4 of a cup of almonds (you can exchange this for fresh ground almond butter)
3/4 of a cup of walnuts or any other nut (cashews and or sunflower seeds are excellent)
2 Tbs of chia seeds
2 Tbs of ground flax seed
1 Tbs of coconut oil
1 Tbs of hemp protein powder (not a fan of protein powder, so I used hemps seeds)
1 Tbsn of raw cacao powder (1 Tbs of crushed cocoa nibs are also good addition as well)

This basic list makes about 12-15 balls. You might consider using a mini ice cream scoop for quick portioning.

Full Instructions Here


Packable Lunches V: Noodle Bowls In A Jar

There are so many things I love about this packable lunch and the top of my list is its versatility. When it comes to lunch preparation, having a base recipe with multiple options is truly a life saver. Whether you pack this delightful lunch along in a mason jar or opt for a wide mouth thermos it will be equally satisfying. (No doubt the glass jar is a gorgeous presentation but it’s not so child friendly.)

noddles-in-a-jar

While this recipe is open for interpretation here’s a list of suggested ingredients along with some alternatives:

par-cooked ramen style noodles (gluten free options galore by Lotus Foods)
1 green onion, chopped
1 Tbsp fresh ginger, grated
1/4 cup sautéed shitake mushrooms (or oyster mushrooms, baby bella’s, etc)
1/4 – 1/2 carrot, julienned (and/or chopped fresh broccoli, bok choy, fresh spinach)
3 tbsp peas (and/ or shelled edamame)
1 tbsp Tamari (or coconut aminos)
1 tbsp toasted sesame seed oil
1 veggie bouillon cube (I prefer Rapunzel brand) or 2 Tbsp of Miso (I prefer Miso Master)
1-2 tsp spicy chili oil, or Sriracha sauce
1 liter mason jar or wide mouth thermos

Directions are as easy as this:

  1. Combine all ingredients in a mason jar, or any other re-sealable jar.
  2. To serve, add boiling water just to cover your noodles and veggies- this can be done ahead of time if you are packing it in a wide mouth thermos. Be sure broth cube or miso paste dissolve.
  3. Enjoy!

My version here was inspired by Jana’s at Nutritionicity.


Packable Lunches IV: Mejadra

Not only is Yotam Ottolenghi’s recipe for Mejadra totally packable it’s also an amazing comfort food! This is a Hubele family standby and the leftovers are coveted for sure. What takes this lentil pilaf over the top is the healthy portion of sweet fried onions. But don’t despair if onions aren’t your thing or you have a finicky eater you are trying to satisfy. Simply skip the additional step of frying onions separately and add a small portion of finely minced onions when you heat the spices.

mejadra

Ingredients
250ml sunflower oil
4 medium onions, thinly sliced (amount can be reduced)
250g green or brown lentils
2 tsp cumin seeds
1½ tbsp coriander seeds
200g basmati rice
2 tbsp olive oil
½ tsp ground turmeric
1½ tsp ground allspice
1½ tsp ground cinnamon
1 tsp sugar (I use coconut sugar)
Salt and black pepper
350ml water

Full directions can be found here or with a beautiful collection of Ottolenghi favorites in Jerusalem.

jerusalem

This pilaf packs well in a wide mouth thermos for a warm lunch or is equally good at room temperature. Any way you serve it, it is delightful and no doubt this recipe will be a favorite in your kitchen as well.


Packable Lunches III: Black Bean Salad

While in Germany last month I searched for recipes to prepare for my omnivore relatives. Looking for something hearty and with a taste of the southwest, I came across this salad by Deliciously Ella. I love her recipes and since she has yet to let me down I gave it a test spin for a family gathering. I’m proud to say it received rave reviews.

black_bean_salad_sweet_potatoes-10

At the time I immediately thought that this would make a fantastic packable lunch. The colors are super appealing, it smells divine, and the taste is awesome. The fact that it received another thumbs-up the next day, after all the flavors had blended, made it a sure winner for this series. While the original recipe calls for sweet potatoes, I prepared it the first time with butternut squash as the price of sweet potatoes in Germany was outrageous. I honestly think you will find it equally delightful either way.

squash

Ingredients:
1 cup black beans, cooked and drained
1/2 cup cilantro, leaves separated and coarsely chopped
1 clove garlic or shallot
1 lime, juice and zest
1 small red onion
1 lb sweet potatoes or medium sized butternut squash
1/2 tsp chili powder
1/4 tsp salt
3 tbsp olive oil
Nuts & Seeds
1/4 cup pepitas

Full Instructions Here

I hope you enjoy this as much as my family did!


Packable Lunches II: Better Than Sandwiches

I’m sure you’ll agree that sandwiches are old-school but we do have to admit they are quite packable. So, when searching for plant-based options, why not look for veggies that can still hold your favorite sandwich fillings? I think these gorgeous peppers are even more appealing anyway!

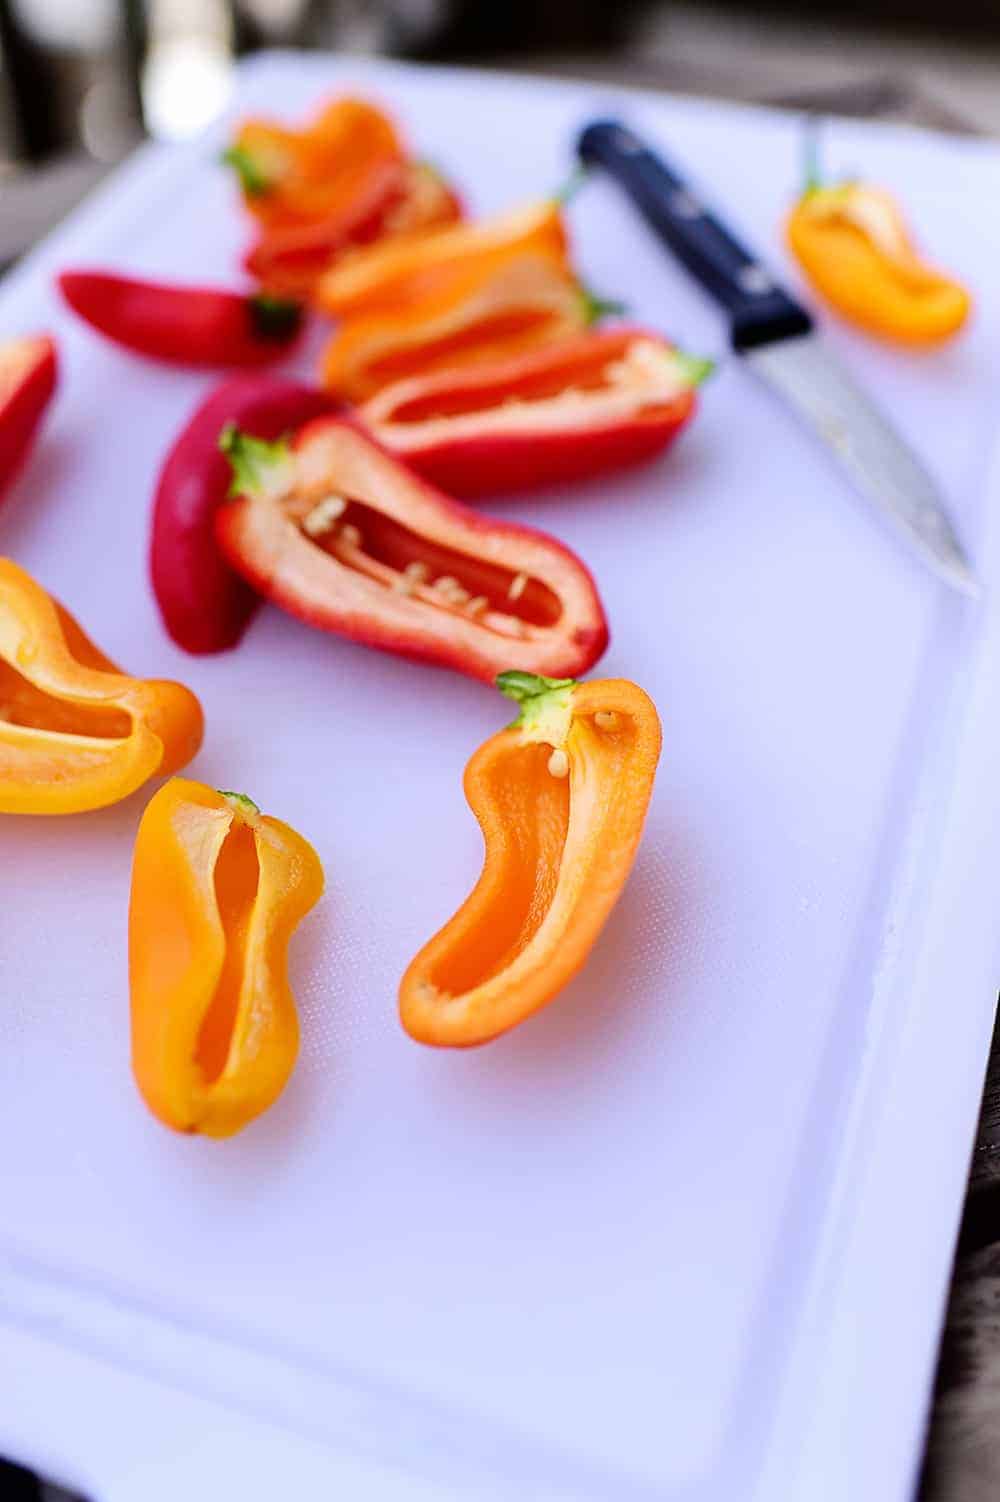
Bags of organic peppers are plentiful this fall and their bright colors and crisp sweet taste make them attractive to all ages. Above and beyond those attributes, they also happen to make perfect holders for your favorite plant-based spread. Whether you want to DIY it with one of my recipes below or you are short on time and want to opt-out for a store-bought spread, you are on your way to a fantastic packable lunch.

The prep work on these is super simple and just includes a light wash, cutting off the top stem portion, removing what few seeds exist, and slicing lengthwise. All set and ready for filling!

Here are two Hubele Family approved spread recipes that you will want to add to your collection.

Lauren’s 5 Minute White Bean Spread

Ingredients:
1 can organic cannellini or white beans, rinsed and drained
1 tbsp Herbs de Provence
1 finely minced shallot
Juice from 1/2 lemon
2 tbsp parsley, fresh finely chopped
3 tbsp Braggs or coconut aminos
2 tbsp olive oil
1-3 tbsp water
Salt and Pepper to taste

This is where an immersion blender is totally worth the investment and shelf space it occupies in your kitchen. All the above ingredients can simply be put right inside a wide mouth jar used for both blending and storage. Just be sure your immersion blender can fit inside the opening! Blend ingredients until smooth, adjust seasonings, and thin to the desired consistency. Now you are ready to fill some sweet peppers.

Herbed Cashew Cheese
While there are countless versions of spreadable cashew cheese recipes, this one from the In Vegetables We Trust blog offers a good basic list of ingredients with straightforward preparation to get you started. Once you get the hang of it you can enjoy customizing it as I do with sundried tomatoes, garden fresh basil, or whatever else inspires me at the moment.

Ingredients:
1 1/2 cups raw cashews (chopped in half if whole cashews)
4 tbsp apple cider vinegar
2 tbsp lemon juice
1 tsp lemon zest
3 tbsp water, plus water to soak the cashews
3 spring onions, diced
2 tbsp chopped chives
3 tbsp chopped flat leaf parsley
A good pinch of sea salt
A good pinch of fresh ground black pepper

Full Instructions Here

No time for making your own spread this time around? I suggest one of the following: an organic ready prepared hummus or plant-based cheese spread. In Austin, our hands-down favorite hummus is Grandma’s by Mediterranean Chef. Plant-based ready prepared cheese spreads also make yummy fillings. Just be sure to read those ingredients lists carefully as some of the larger commercial brands add all sorts of items that should be avoided such as soy and stabilizers you can’t pronounce. Our favorite is produced by Treeline.

hummus-stuffed-peppers-sweet-mini-peppers-recipe-


Packable Lunches I: Chard Wraps

As we move from the more relaxed pace of summer to the often overly structured days, every minute in the kitchen counts. As a 29 year veteran mom I can tell you there was truthfully no chore I dreaded more than lunch packing. This month I’d like to help remove the sting by sharing six of my favorite packable lunches. We’re starting off with these sweet chard wraps for two reasons:

  1. They are my favorite lunch hack by far! (Especially if you avoid grains.)
  2. I made a set last week for our 50K bike trip and if they handled the jostling in my bike basket, they surely meet my standard for a packable recipe.

Chard Wrap

Yes, I know. I have featured chard wraps before but, honestly, there are so many reasons to love these delightful little packets! I will spare you the rest of my list this time around and just get into the how-to’s.

The wraps pictured here feature the following ingredients (in order of use):

  • Garden fresh chard leaves, the smaller more tender the better
  • Avocado, mashed with a drizzle of olive oil for spreading
  • A dollop of sundried tomato pesto
  • Thin slices of sweet pepper
  • Grated carrots

Instructions:
1. Remove the spine from each chard leaf by flipping it face down on a cutting board. Use a knife with a pointed tip and trace along the outline of the spine and remove, leaving two strips of chard. (This is much easier when using young smaller leaves.)

Chard Wrap

2. Begin with the wide base of the leaf and spread mashed avocado 1/3 the way up the leaf.

3. Add the dollop of pesto, smoothing with a knife to cover the avocado.

4. Top the filling with a few thin slices of sweet pepper and grated carrots.  Roll the wraps from the wide end to the narrow.  Place wraps in the container you will pack along for the day, aligning them to fill the available space.

Chard Wrap

While these can certainly be made the night before, I’ll admit they are best when fresh. To save time on those hectic mornings, prep the fillings the night before and make quick work with remaining steps or you can even have the kids roll their own.

Enjoy!


Cooking with Oma: Hirseauflauf

Let me tell you that it was no easy decision choosing what to write this week, having only one last recipe to share! There are so many more! We did however settle on a winner that is as delightful as it is easy to make. Before I get too far into it, however, I wanted to clarify our use of eggs in the past few recipes. I eat and promote plant based eating. The standard for plant based eating is 80% whole food from plants. As a family we do not consume foods from animals with two exceptions- honey and (on extremely rare occasions) eggs from true free range organically fed, humanely cared for hens. Over the past years while visiting Germany, we have certainly pushed the limits with my mother-in-law’s recipes. Omitting the flours, then all of the dairy products has been a true feat. This time we decided to give her a break and have been flexible when it comes to eggs, especially since she rides her bike to the next village and collects them from the small farmyard herself. So today’s recipe, like the Pfannkuchen, uses eggs. They can always be replaced with flax egg but the texture will change as it does depend on the egg whites.

So let’s get started!

What’s a Hirseauflauf you ask? Well it’s as simple! Hirse is millet in German and auflauf is a baked casserole. They can be sweet, as in this case, or savory. We happen to be a big fans of auflauf at our house and will share a series later in the fall.

Hirseauflauf

Ingredients:
250 gram of millet
1 liter of water
1 cinnamon stick
Vanilla powder, or extract
3 separated eggs
700 grams of apples
150 g of finely chopped hazelnuts (almonds, walnuts or pecans are good substitutes)
150 g of honey or maple syrup
Grated peel from one lemon
(100-200 grams of golden raisins if desired )

Step One:
If you are Oma, this recipe starts with grabbing a ladder and heading down the garden to your 50 year old apple tree full of tart baking apples. If you aren’t Oma, I think it would be perfectly fine to select some delicious organic Braeburn or Granny Smith apples at the store.

Oma

Apples

Step Two:
Preheat oven to 375 degrees. Put the water on to boil with the cinnamon stick and millet. Once boiling, reduce heat to simmer, cover, and cook until grains are tender, 20-30 minutes. Remove the cinnamon stick. This is best done ahead so the millet can be brought to room temperature before mixing with the eggs.

Step 3:
Cut apples in quarters, remove seeds, and chop finely. They can also be grated with your food processor. Mix with the chopped nuts, honey and lemon peel, and set aside.

Step 4:
Beat egg whites until stiff.

Step 5:
Blend by hand the room temperature millet with egg yolks first and then with apple mixture. Fold egg whites very carefully into the fruit, nut, and egg mix. Transfer into a casserole lightly greased with coconut oil.

Step 6:
Bake for 45 mins. Auflauf should be set and golden brown on top.

Hirseauflauf

Can be served with a traditional vanilla sauce (thin pudding) made with cashew or coconut milk.

And I’m just saying- There was not one bite leftover!


Cooking with Oma: Schwäbischer Kartoffelsalat

Oma Hubele has a place of honor in our household for many, many reasons but this recipe helped her win over the hearts of my two teenage daughters sixteen years ago. Since then, in their eyes, no one can make potato salad quite like Oma. While I have made a few futile attempts I have to admit that I let go of mastering it years ago. Times have changed and this summer Oma was fairly certain I could be successful and not only that, she suggested it should be featured on my blog. (Thanks to Google translator she is one of my biggest fans!) So Kartoffelsalat it is and you are going to love it!

schwaebischer kartoffelsalat

Let’s see, first you are going to need to plant some potatoes… Here are the ones Sebastian harvested earlier in the week from Oma’s garden with this beautiful hand forged tool from Great Opa Hubele. How cool is that?

potatoestool

Perhaps planting potatoes is a bit ambitious this year? OK, that’s no problem. Then I suggest you buy organic young fingerlings, baby Yukon gold, or red creamers. What is very important is that they remain sturdy when cooked- so certainly not russets. In Germany this type of potato is referred to as festkochend. When I first moved to Germany I was astounded by the varieties of potatoes available and that they really each had their own flavor and purpose.

Once the potatoes are in hand, whether fresh harvested or store bought, here is what’s next.

recipe card

Ingredients:
3-3.5 lbs of potatoes
¾ cup of Organic Vegetable broth (I use a Rapunzel cube with boiling water)
3-4 tablespoons wine, apple cider, or herb vinegar (your preference with taste)
2-3 tablespoons mild Olive or Sunflower Oil (your preference with taste)
1 small onion very finely minced
Salt & Pepper to taste
Chopped parsley and/or chives to sprinkle over the top
Optional: boiled organic free range egg, preferably farm fresh, on top for non-vegans

Directions:
1. Cook potatoes with their skins until just fork tender in a steamer basket or insert- not directly in the water. Be careful not to overcook!

boiled potatoes

2. Drain, rinse with cool water, and quickly peel and slice thin while still warm.

sliced potatoes
3. Mix broth, vinegar, oil, and seasonings together and pour over slightly warm potatoes, combining with your hands.

sliced prepared
4. Add onions and let the salad sit at room temperature for at least an hour before serving. (The longer the better.)

potato salad

What is so important is that this salad is never refrigerated! Even if there is some leftover, which is doubtful, just store it in a cool place in your kitchen. Refrigeration will change the texture and ruin this beautiful salad.

Give it a try! I just had a taste from the batch we prepared here and it is perfect!


Cooking with Oma: Pfannkuchen

I can honestly say I have never tasted anything but perfection out of my mother-in-law’s kitchen. Not only are her meals delicious, she is a total whirlwind and I’ve learned over the years to let her be, for good reason! While there are times she more than generously shares her kitchen with me, there are some meals best observed in awe from a distance. Pfannkuchen falls into the latter category. In what seems like minutes, she whips farm fresh egg whites into snowy billows, watches over four sizzling pans at time, and produces picture perfect dinner plate sized puffed golden pancakes.

Pfannkuchen

I will admit I am repeating a recipe from last May but truthfully it bears repeating! Last year’s version was filled with cherries direct from the backyard garden and this year’s behold handpicked gorgeous blueberries from France.

OmaSebastian

As I explained last year, one of the many nice surprises I had as a new member of the Hubele family some years ago was that sweet main course meals happened to be a specialty of this Schwäbisch region of Germany. Well how could I argue with tradition? These years with our family diet being plant based we stray just enough to honor tradition and partake annually in Sebastian’s favorite, pfannkuchen.

Here is the basic recipe for four meal-sized pancakes adapted for our family to be gluten and dairy free:

4 eggs separated
1/3 to 1/2 (90-125 ml) of a nut-based milk (I suggest almond or cashew milk.)
1-2 tablespoons of sugar (I suggest coconut sugar.)
1 cup (250 g) of gluten free flour blend
Pinch of salt
2-3 cups (500-750 g) of blueberries

Beat egg whites and the pinch of salt until stiff and dry and set aside. Beat the egg yolks and the sugar until thick. Whisk the flour into the yolks. Add milk gradually as the amount used will vary depending on egg size. Ultimately you want a thick batter that will mound when dropped from a spoon- not runny. Finally, gently fold beaten whites into the yolk based batter.

Heat on medium, similarly sized skillets having first added a bit of coconut oil to each one. When skillet is hot, divide batter evenly. Top with fruit, covering the entire surface as in the photo.

Pfannkuchen

Cook on medium heat 3-5 minutes. When the bottom of pancake is golden brown and the edges of the batter are well set, flip using a dinner plate to assist, and cook another few minutes. Patience and a low to medium heat are important so the pancake will cook all the way through without burning.

Eat slowly and savor each bite!